This year I completely changed up my Christmas tree because honestly, I needed a small project to tackle being home so much! And today I want to walk you thru how to add ribbon to your Christmas tree. I promise you, it’s much easier than it looks.
About Our Tree
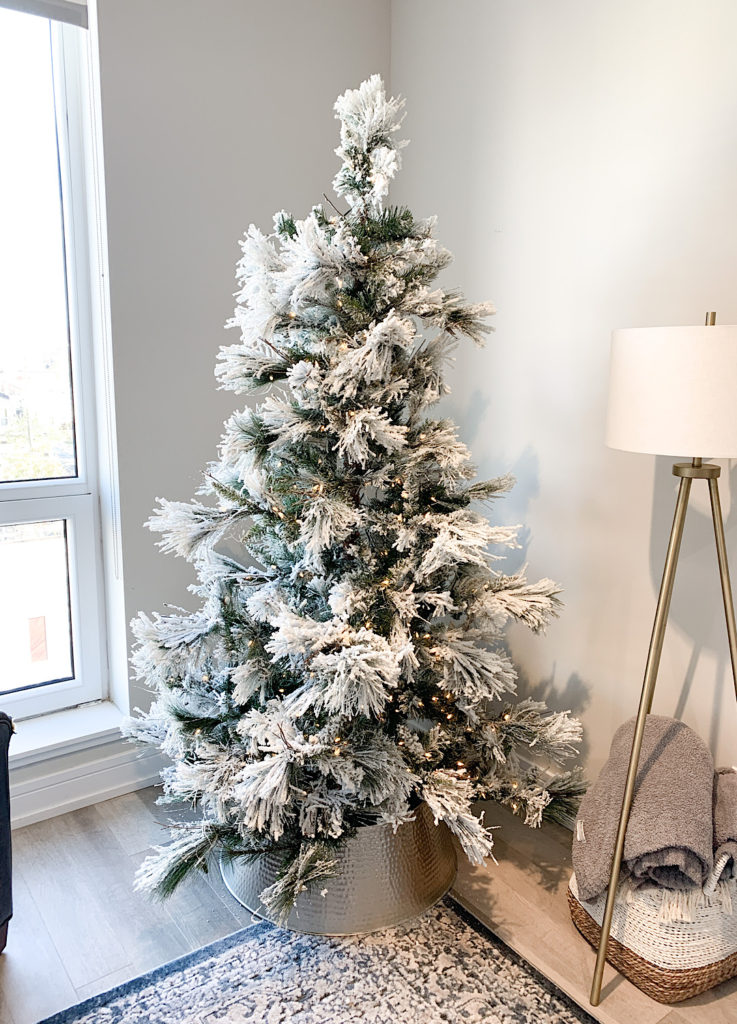
I bought our flocked tree three years ago and I love this tree. It was exactly what I had wanted and envisioned. My only regret was not buying a bigger one, but at the time we were living in a much smaller space so it would not have fit even if I had tried. Or our entire living room would have just been all Christmas tree haha. I feel like I could have dealt with it, but I know Kurt would have been complaining the whole Christmas season haha!
Anyway, this tree is beautiful and I can’t recommend it enough. I was a little overwhelmed at first when I first took it out of the box because the branches are not like a typical tree. It is hard to fluff them like you normally would because the branches are more fluffy? I’m not really sure how to describe them, but they a little harder to figure out how you need to bend them to make them look good. It took some figuring out, but once I did, I love how it turned out. Every year it gets easier and easier with this too.
The best part of the tree are the lights. Once you you add another layer of the tree, you don’t even have to plug any of the lights in. You just slid the new part of the tree into the center column and boom, the tree lights up. I was pleasantly surprised by this feature! It is so much easier than having to look for the last part of the lights to connect to.
And yes, it does shed being that it is a flocked tree. But I absoutley love the look of it. So for me, it’s worth it. It’s actually really cute because one of our cats, Frank LOVES the Christmas tree. And you always know when he has been under the tree because he will have snow on his head haha.
What Kind of Ribbon to Buy
Being that is was my first year adding ribbon to our tree, I pinned a lot of inspiration pictures on Pinterest and kind of went from there. I first started with the ribbon because I knew this would set the tone. I highly recommend finding ribbon that has a wire in it. It is so much easier to work with you then you can manipulate it to make it stick and stay where you want it to.
Initially I bought way more ribbon than I thought I needed. I was so nervous that I was going to find a pattern that I loved and once I got to actually decorating my tree I would end up needing more than I thought I would. And I was so scared that it would be sold out if I did need more! So I bought more than I needed and ended up returning any leftovers.
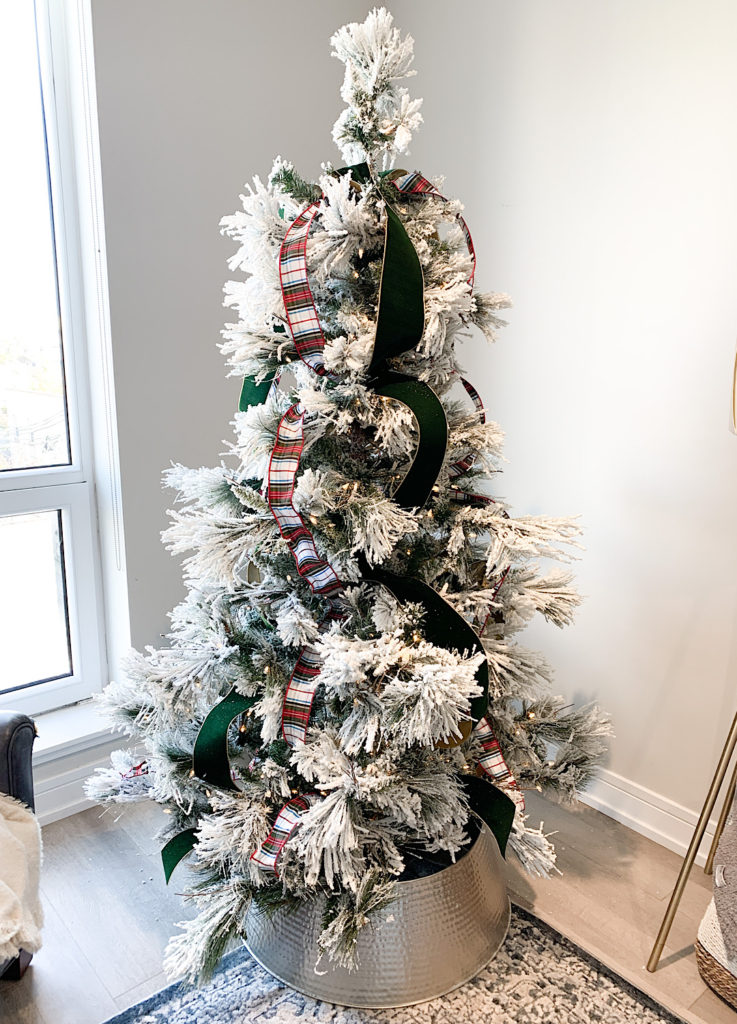
I ended up using two different patterns of ribbon on my tree. Initially, I thought a wider 4″ ribbon would be the best, but I actually think the smaller 2.5″ ribbon turned out better. If you have a a bigger tree, that might not be true, so it could all depend. Anyway, I used this 4″ dark green velvet ribbon with a gold trim and I just love the contrast it has on the white snowy tree. I also used a 2.5″ white plaid ribbon to fill in with. Here are some additional ribbons that would look beautiful on your tree:

Adding Ribbon to Your Tree
After getting your tree set up and fluffed, the first thing you want to add is your ribbon. And I started with the dark green one because it was thicker and I knew it would be a little more bold on my tree. I left the ribbon on the spool and carefully bent it over one of the branches, starting at the top of the tree. I then carefully let a little ribbon drape down and then tucked a little portion of it into a branch. And then I repeated that step until I was at the bottom of the tree. Once I was happy with how the ribbon had flowed down the tree, I cut the ribbon on an angle and that was that!
Once I had the green ribbon complete, I moved onto the plaid ribbon. I did all of the green first and just left bigger sections in between since I knew I would be adding the smaller plaid ribbon in between. I continued around the tree until my tree was covered in ribbon. In the end, I ended only using two spools of ribbon (one of each color), which was way less than I had originally thought it would be. Next year, it will be a little less time consuming just because the ribbon will already be cut into sections. Overall, it was way easier than it looks and much less time consuming than I had originally planned for.
Add Picks for Depth
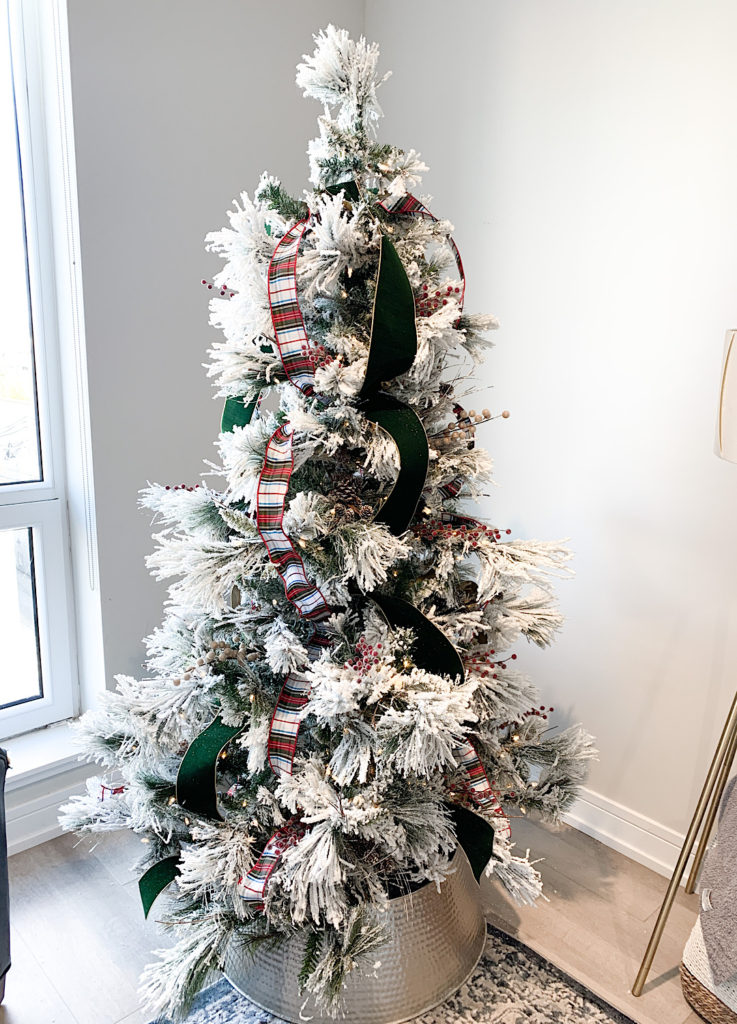
The next step once you have added your ribbon, is adding picks to the tree. I think these really make the tree pop and adds personality to your tree! I had a really hard time online finding picks that I liked for some reason. So I highly recommend going into the store for these. Hobby Lobby had the best selection of them this year…..and at the lowest prices. I think I paid $1 per pick, so they were a steal!
This is where I ended up needing way more than I thought I would. And I even asked my mom to go back to the store to me to get more for me. What you see in this image is about 24 picks total which I think looks great. But I want more of the red ones, so my mom went back and bought me 20 more. We actually don’t have a Hobby Lobby in the city or even relatively close or else I would have gone myself. The whole back of tree doesn’t have any picks on it right now. Which isn’t that big of a deal since it sits against the wall, but there are still some areas I want to add more too, mainly for the color.
The trick to adding these is really simple. Just stick them into the branch, but you want it to stick up a little bit, so push the pick down when you are inserting it. This adds more depth to the tree. And gives you that pop.
When I was initially doing my research on how to decorate my tree this year, I read that you should stick to only three different types of picks. I actually ended up with four different kinds, but I don’t think it matters. And in this case, the more the merrier!
Another tip when you are shopping for your picks, is don’t get caught up in the size of them. I initially thought they all had to be long enough so it would lie nicely on the long branches. But event the shorter picks work too. You can add them more to the top of the tree. Or if you want to add a smaller one to a longer branch, just stick them in the branch, but closer to the end so you see it more.
You will see this in the image below, but I also used these picks as my tree topper. I just stuck them upwards at the top of the tree. It looks a little bare right now, so this is where I will be adding more to it. The top of my tree doesn’t have a good base to add a traditional topper. The branch is very all over the place. So I think this is a really cute way to add some color and interest to the top of the tree. In years past, I just left it blank.
Here are some picks to choose from:
Filling in with Ornamanets
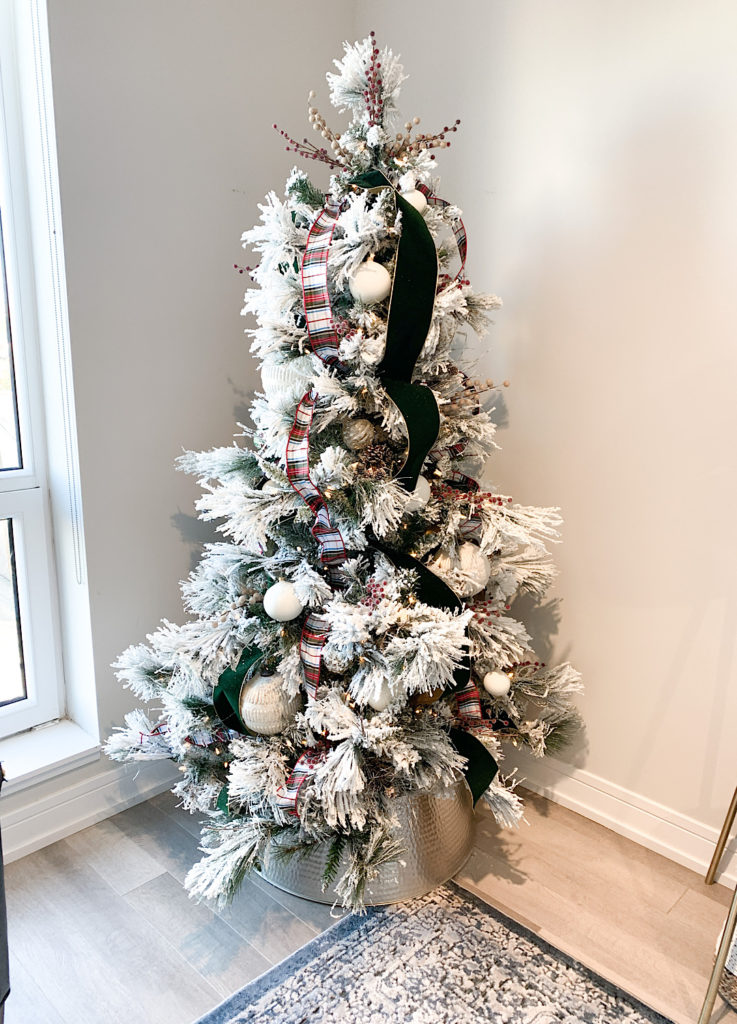
Once you have your ribbon and tree picks in, its time to add your ornaments. If you are going for a “theme” and certain color scheme I would add these in first. I would also start with your biggest ornaments first. This year, I bought some new ornaments from McGee and Co. and wow I am super impressed! I added these huge ones to my tree first. When I first got these I was like oh boy, are these going to even fit?! But I love the way they look!
I also ordered this set and this set. At first, I was a little dissappointed because online the color said white. And in real life these are clearly off-white. Once I added them to the tree though, you really can’t tell the difference. And in reality I think I like the off-white better because they pop a little more instead of blending in.
Once you have your colored or themed ornaments hung, add in your keepsake ornaments. I kind of kept these towards the side of the tree or towards the back because I really wanted my white ones to show. It was kind of sad decorating the tree this year. Every trip we take throughout the year, I always purchase an ornament as a keepsake. And, well since we didn’t travel at all this year there were no new ones to add!
And there you have it! I was pleasantly surprised at how much easier it is than I thought it would be. And there is really no right or wrong way to add the ribbon or picks. The ribbon is suppose to look sort of messy anyway.
One last thing I want to add is I picked up this tree collar (it also comes in gold) and I am so obsessed with it! I’ve been using the same tree skirt for years now, so it was time to try something new and wow! I think it makes a huge difference. Even Kurt commented on how nice it looked and he is sort of the grinch when it comes to Christmas!
Happy Holidays and happy decorating!!
Shop the Post
xoxox Amanda
You may also like Shopping for Christmas Home Decor